
Have you ever found yourself in a situation where something in your home is not working quite right, and you need to figure out if it’s something you can fix yourself? Dealing with electrical issues in your house can be intimidating, but with the right information, it can also be manageable. Understanding the basics of house electrical repair can empower you to tackle common problems and possibly save on repair costs.
Understanding Your Home’s Electrical System
Before you jump into any repairs, it’s important to know how your home’s electrical system works. Your house is powered through a complex network of wires and circuits, designed to deliver electricity to every outlet, light fixture, and appliance.
How Electricity Travels
Electricity comes from the utility company and enters your home through a service drop. It then moves into a service panel where it is divided into various circuits that power different areas of your home. Each circuit is protected by circuit breakers or fuses, ensuring safety and preventing overloads.
The Importance of Safety
Whenever you’re involved with electrical repair, safety should be your top priority. Always remember to turn off the power at the circuit breaker before starting any repairs. This simple step can prevent accidents and injuries.
Common Electrical Issues in the Home
There are a variety of electrical problems that you might encounter in your home. Understanding these issues can help you identify whether you need to call in a professional or if it’s something you can handle on your own.
Flickering Lights
Flickering or dimming lights can be more than just an annoyance; they can indicate a serious electrical issue. Often, this is caused by a loose bulb, a faulty fixture, or an overloaded circuit.
Steps to Diagnose:
- Check Light Bulbs: Ensure the bulbs are securely fastened and suitable for the fixture.
- Examine the Fixture: Check for loose connections in the fixture itself.
- Inspect the Circuit: If multiple lights flicker, you may have an overloaded circuit.
Non-Functional Outlets
A dead outlet can be frustrating, especially if it powers important appliances. The cause can range from tripped breakers to faulty wiring.
Troubleshooting Steps:
- Test the Outlet: Use a multimeter or plug in a working device.
- Check the Breaker: Look for tripped breakers in your service panel.
- Inspect Wiring: If safe to do so, check for visible damage to the outlet and wiring.
Circuit Breaker Tripping
Circuit breakers are designed to trip when there’s an overload or a short circuit. If yours is tripping frequently, it’s essential to find the underlying issue.
Diagnosing the Problem:
- Identify Overloads: Determine if appliances on the circuit exceed its capacity.
- Look for Short Circuits: Inspect for faulty appliances or damaged cords.
- Seek Professional Help: If you can’t find the cause, it may be time to call an electrician.

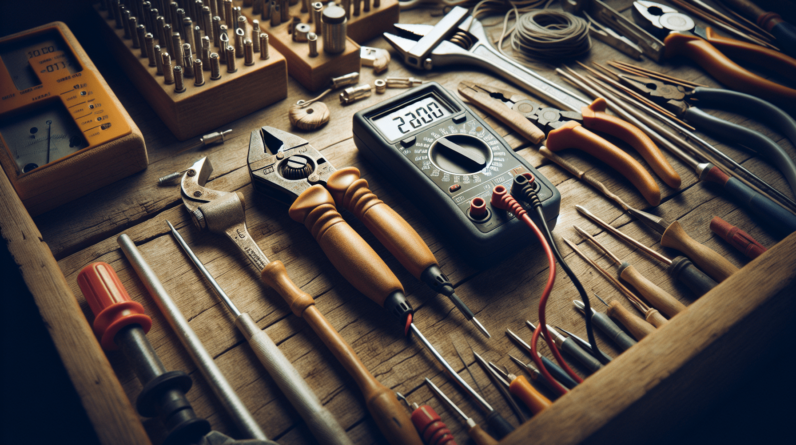
Basic Electrical Tools and Supplies
If you’re considering taking on some electrical repairs, having the right tools is essential for both safety and effectiveness.
Essential Tools Every Homeowner Should Have
| Tool | Purpose |
|---|---|
| Multimeter | Measures voltage, current, and resistance. |
| Screwdrivers | For loosening and tightening screw connections. |
| Wire Strippers | To remove insulation from electrical wires. |
| Pliers | Useful for gripping and twisting wires. |
| Voltage Tester | Checks live wires to prevent shock. |
Safety Equipment
Don’t overlook safety gear. Having the right protective equipment can prevent accidents.
| Equipment | Purpose |
|---|---|
| Safety Glasses | Protects your eyes from debris. |
| Rubber Gloves | Insulated gloves reduce shock risk. |
| Non-Conductive Ladder | Safe access to overhead fixtures. |
Performing Basic Repairs
Now that you have a basic understanding of your electrical system and the necessary tools, let’s look at some common repairs you might consider undertaking.
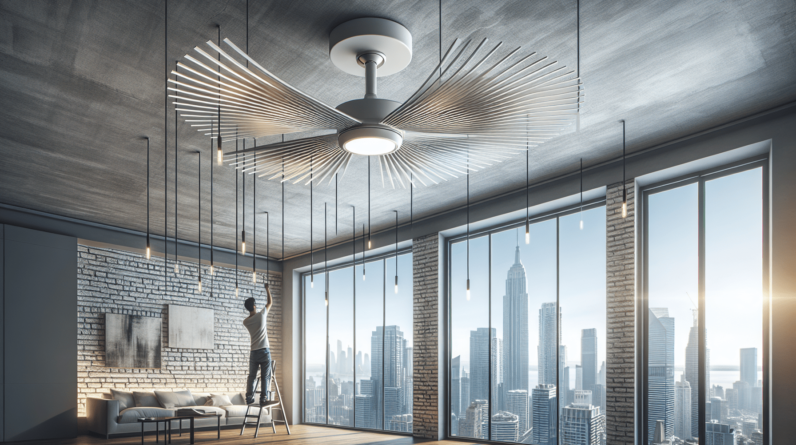
Changing a Light Fixture
Changing out a light fixture can refresh a room and is generally a straightforward task.
Step-by-Step Guide:
- Turn Off the Power: Switch off the circuit breaker controlling the light.
- Remove the Existing Fixture: Unscrew it from the ceiling and disconnect wires.
- Connect the New Fixture: Match the wires from the new fixture (black to black, white to white, and green or bare to the ground wire).
- Secure and Test: Reattach the fixture, turn the power back on, and test the light.
Replacing an Outlet
Outlets can wear out over time or become damaged. Replacing them is not overly complicated.
Follow These Steps:
- Cut Power: Switch off the appropriate breaker.
- Remove the Old Outlet: Unscrew and disconnect the old unit.
- Connect the New Outlet: Attach the wires to the new outlet in the same configuration as the old one.
- Test the Outlet: After securing everything, turn the breaker back on and check functionality.
Resetting a Circuit Breaker
Sometimes, all it takes to fix an electrical problem is resetting a tripped breaker.
How to Reset:
- Locate the Service Panel: Find your circuit breaker box; it’s usually in a basement, hallway, or garage.
- Identify the Tripped Breaker: Look for a breaker that is in the “off” position or midway.
- Reset the Breaker: Firmly push it to the “off” position, then back to “on.”

When to Call in a Professional
While DIY electrical repairs can be fulfilling, there are times when it’s best to leave things to the experts. Recognizing those moments can keep you safe and supported.
Complicated Wiring Situations
If you encounter old or complicated wiring, it’s advisable to get a licensed electrician involved. They have the expertise to navigate tricky situations without putting yourself at risk.
Permit Requirements
Some electrical jobs require permits, especially if they involve major changes to your home’s wiring. This is another situation where an electrician is your best bet, as they can handle the permits and compliance.
Ongoing Electrical Issues
If you’re frequently experiencing problems with flickering lights, tripped breakers, or outlets that don’t work, it’s a sign of a more serious issue. Get a professional to diagnose and repair the underlying cause.
Preventative Measures for Electrical Safety
Preventing electrical problems from arising in the first place is the best course of action. Here are some tips to help you keep your home’s electrical system in tip-top shape.
Regular Inspections
Conduct regular inspections of your home’s electrical system.
- Check for frayed wires and loose connections.
- Monitor the condition of outlets and switches.
- Make sure all electrical appliances are in good working order.
Upgrading Old Systems
If your home has old wiring or circuit breakers, consider upgrading.
Older systems can become a fire hazard and may not be able to handle modern electrical loads. Upgrading ensures safety and efficiency in your home.
Use Surge Protectors
To protect your electronics from power surges, invest in quality surge protectors. They provide an extra layer of safety, particularly in storm-prone areas.
Conclusion
Becoming knowledgeable about house electrical repair can make you feel more confident when handling minor home repairs. You’ve learned about common electrical issues, basic repairs, and when to call a professional.
By prioritizing safety and conducting regular maintenance, you can keep your home’s electrical system running smoothly. Remember, if an issue ever feels beyond your skill level, it’s always best to seek professional assistance. Your home deserves the best care, and by understanding your electrical system, you make sure it stays in good shape for years to come.