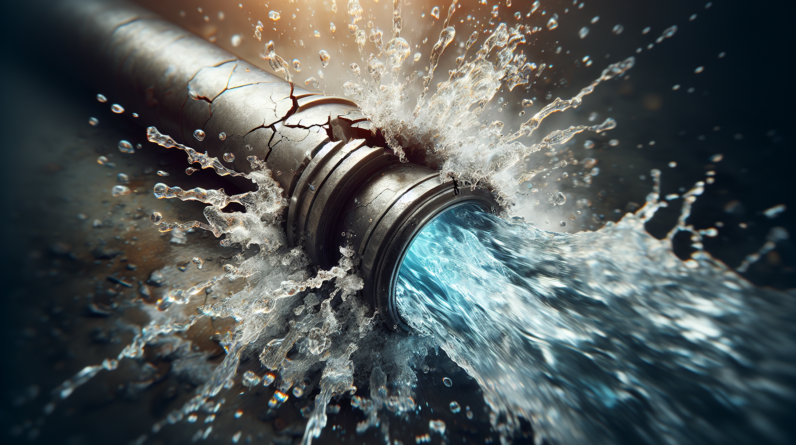

Imagine this scenario: you walk into your home after a long day at work and suddenly, you hear the sound of rushing water. Panic sets in as you realize you have a burst pipe on your hands. But fear not! In this article, we will guide you through the steps to fix a burst pipe, ensuring you can take control of the situation and prevent further damage to your home. Whether you’re a DIY enthusiast or a novice when it comes to plumbing, we’ve got you covered. So grab your tools and let’s get started on resolving this pesky burst pipe once and for all.
Assessing the Damage
Locating the Burst Pipe
When faced with a burst pipe, the first step is to locate the exact location of the damage. Look for signs of water leakage such as a damp or wet spot on the walls, ceiling, or floors. You may also notice a decrease in water pressure or hear the sound of running water even when no faucets are turned on. Take your time and thoroughly inspect the plumbing system to pinpoint the burst pipe.
Shutting off the Water Supply
Once you have located the burst pipe, it is crucial to shut off the water supply immediately. Look for the main water shut-off valve in your home, usually located near the water meter or where the main water line enters your property. Turn the valve clockwise to shut off the water flow. By doing so, you prevent further water damage and give yourself the peace of mind to work on the repair.
Draining the Water
After shutting off the main water supply, it is important to drain any remaining water from the pipes. This step is vital to prevent any additional leakage or pressure buildup. Start by opening all faucets, both indoors and outdoors, to allow the water to flow out. Additionally, flush toilets and turn on showers or tubs to ensure all the water is drained from the plumbing system. Remember, safety first – always wear gloves and use buckets or towels to manage the water flow.
Inspecting for Additional Damage
Once you have shut off the water supply and drained the pipes, take the time to inspect the surrounding area for any additional damage. Water leaks can lead to water damage on walls, ceilings, or even the structural integrity of your home. Look for signs of mold, mildew, or rotting materials. Check for any electrical hazards that may have been affected by the water. The sooner you identify any secondary damage, the quicker you can address it and prevent further issues down the line.
Repairing the Burst Pipe
Gathering the Necessary Tools and Materials
Before you begin repairing a burst pipe, it is crucial to gather all the necessary tools and materials for the job. You will need a pipe cutter or hacksaw, pipe adhesive or solder, a torch or heat gun, pipe fittings, and a pipe repair clamp, depending on the type of burst pipe. Additionally, have a bucket, towels, and a plumber’s tape or sealing compound on hand for any immediate repairs or temporary fixes.
Repairing a Copper Pipe
To repair a burst copper pipe, start by cutting out the damaged section using a pipe cutter. Ensure to leave enough space for the new piece of pipe to fit properly. Once the damaged section is removed, use a pipe brush or sandpaper to clean the ends of the pipe and remove any debris or oxidation. Apply pipe adhesive or solder to the cleaned ends and join the new piece of pipe using fittings appropriate for copper pipes. Allow the adhesive or solder to dry completely before turning the water supply back on.
Repairing a PVC or CPVC Pipe
For a burst PVC or CPVC pipe, begin by cutting out the damaged section using a hacksaw. Smooth the edges with sandpaper or a deburring tool. Apply primer and then pipe adhesive to both the pipe and fittings. Slide the fittings onto the pipe, ensuring a secure and tight fit. Allow the adhesive to dry according to the manufacturer’s instructions before testing the repair.
Repairing a Galvanized Steel Pipe
To repair a burst galvanized steel pipe, first, identify the damaged area. Use a pipe cutter or hacksaw to cut out the damaged section, ensuring clean and squared edges. Clean the ends of the pipe with sandpaper or a pipe brush to remove any rust or debris. Apply pipe compound to the threads of the new pipe section and join it to the existing pipe using pipe fittings. Use a pipe wrench to tighten the fittings, making sure they are secure. Turn on the water supply and check for any leaks.
Replacing a Burst Pipe
Choosing the Right Replacement Pipe
In some cases, the burst pipe may be beyond repair and need to be replaced entirely. When choosing a replacement pipe, consider the material, size, and compatibility with your existing plumbing system. Consult a professional or research the best options for your specific needs. Common replacement pipe materials include copper, PVC, CPVC, or galvanized steel.
Preparing the Pipe for Replacement
Before installing the new pipe, ensure all water is shut off and the pipes are drained. Cut out the damaged section of pipe using a pipe cutter or hacksaw. Clean and sand the edges of the existing pipe to remove any corrosion or debris. Measure and cut the new pipe to fit the gap, ensuring precise measurements. Sand the cut ends of the new pipe to remove any sharp edges or burrs.
Installing the New Pipe
With the old pipe removed and the new pipe prepared, it is time to install the replacement. Apply pipe adhesive or solder to the ends of the new pipe and join it to the existing plumbing system using appropriate fittings. Ensure a secure and tight fit, allowing the adhesive or solder to dry completely before turning on the water supply. Test the installation by running water through the newly replaced section and check for any leaks.
Testing and Inspecting the Repair
Once the replacement pipe is installed, it is important to test and inspect the repair thoroughly. Turn on the water supply and observe the repaired section for any signs of leakage or decreased water pressure. Monitor the surrounding area for any potential water damage. If everything appears to be in working order, continue to keep an eye on the repair in the following days to ensure its long-term stability.
Preventing Future Pipe Bursts
Insulating Pipes
One effective way to prevent future pipe bursts is by insulating your pipes. Insulation helps protect pipes from extreme temperatures, reducing the risk of freezing and subsequent bursting. Use pipe insulation sleeves or wraps to cover exposed pipes, especially those located in unheated areas such as basements, crawl spaces, or attics. Proper insulation can help maintain a consistent temperature and prevent potential pipe damage.
Maintaining Proper Water Pressure
Another important preventive measure is to maintain proper water pressure in your plumbing system. High water pressure can put excessive strain on pipes, making them more susceptible to bursts or leaks. Install a pressure regulator or pressure-reducing valve to ensure the water pressure remains within a safe range. Consult a professional if you are unsure how to regulate or adjust your water pressure.
Avoiding Freezing Temperatures
One of the most common causes of burst pipes is freezing temperatures. Protect your pipes during winter months by taking necessary precautions. Insulate all exposed pipes, especially those along exterior walls or in unheated areas. Allow faucets to drip during extremely cold weather to prevent any built-up pressure. If you are away from home for an extended period during winter, consider shutting off the water supply and draining the pipes to minimize the risk of freezing.
Routine Plumbing Inspections
Regularly inspecting your plumbing system can help identify potential issues before they escalate into burst pipes. Look for signs of corrosion, rust, or weakened joints. Check for leaks or dampness around pipes and fittings. Monitor water pressure and be alert to any changes in water flow. If you notice any abnormalities, it is best to address them promptly to prevent further damage.
When to Call a Professional
Complex Plumbing Systems
While many burst pipe repairs can be handled on your own, some situations call for professional assistance. If you have a complex plumbing system, such as a multi-story house or intricate pipe network, it is advisable to seek the expertise of a licensed plumber. They have the knowledge and experience to navigate complex repairs and ensure your plumbing system is properly restored.
Extensive Water Damage
If the burst pipe has caused extensive water damage to your home or property, it is strongly recommended to call a professional restoration company. Water damage can lead to mold growth, structural issues, or electrical hazards. A professional restoration team has the expertise and specialized equipment to handle the mitigation and restoration process effectively, minimizing further damage and ensuring a safe environment.

Lack of Experience or Knowledge
If you lack experience or knowledge in plumbing repairs, it is best to leave the job to professionals. Improper repairs can lead to further damage, potential leaks, or safety hazards. Hiring a professional plumber not only ensures the burst pipe is fixed correctly but also provides peace of mind knowing that the repair is done safely and efficiently.
Conclusion
While a burst pipe can cause significant stress and damage, it is a problem that can be resolved with the right knowledge and tools. By assessing the damage, repairing or replacing the burst pipe, and taking preventive measures, you can mitigate the risk of future bursts. Remember to always prioritize safety and rely on professional help when needed. With proper care and maintenance, your plumbing system can remain in good condition, providing you with years of trouble-free service.

